Writing out your Wedding Invitations
Tips – Writing out your Wedding Invitations

- Order enough invitations …You only need one invitation per couple but there are bound to be a few singles also. There will probably be 3 lists – one from the bride’s family, one from the groom’s family and one from the couple. Ensure that you have included absolutely everybody before counting up numbers. We would always advise ordering 15% more than you think you need. This will allow you a few extras – for making mistakes when you are writing them out and also the odd person you might have forgotten. When you get your replies back there may be a few people who can’t go – you then have a few spare for inviting others if you wish. It is very expensive to order a reprint so do ensure that you order enough. It is good manners to send an invitation to the minister and his wife. It is also courteous to invite people who for reasons of great distance or illness are likely not to be able to attend. The parents of the groom are sent an invitation as a formality.
- Order on time … allow plenty of time so you can enjoy writing out your invitations instead of it being a mad rush. We would advise ordering approx. 4 months before your wedding.

- Ensure that you have your lists of names and addresses ready before your invitations arrive from the printers. You will need full details including post codes.
- Decide on how you wish to style names on invitations. It is usual to have Mr & Mrs though some brides put Christian names only.

- Sometimes the names of the guests are written on the reply card and not on the actual invitation. This is entirely your choice – some brides do not wish to ruin their invitations with their handwriting! You may wish to employ a calligrapher to write your invitations (or a member of you family who has beautiful writing).
- Take time to methodically work through your list in an orderly fashion, marking off each name as they are completed. It is best to set a time aside when you have peace and quiet and can spread your work out – perhaps on a dining table.
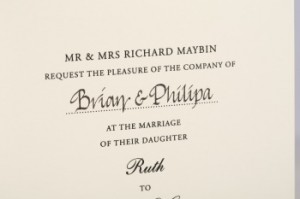
- The invitee’s name is written by hand, either in the top left-hand corner of the invitation or on the dotted line within the text. A fountain pen with black ink gives a traditional look but you may choose something different. Avoid biros! The type of pen you use will have a great impact on how the finished product looks. Try a few pens out to see which looks best and flows well on your invitations.

- Think carefully about where you start each name on the dotted line. A short name needs to be towards the middle of the line, long names to the left. I usually start by writing the short names first and gradually moving to the left as I write longer names.
- If you carefully rule lines on the back of a discarded invitation and insert it into the envelope you can usually see the lines through the front of the envelope and thus get a guide to write you addresses. They will turn out much neater and evenly spaced.
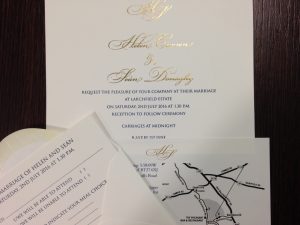
- Don’t forget to include any enclosures such as reply cards and information sheets.
- Check each invitation is correct before sending.
- I usually advise sending daytime invitations a couple of weeks prior to evening invitations. Daytime invitations are usually sent around 8 weeks in advance though you might choose to send them earlier to allow transport and accommodation arrangements to be made. If you get some replies back from people who can’t come you can then upgrade some people from evening to daytime guests if you have delayed sending your evening invitations.
- Ensure that you have correct postage on your invitations. It may be worth a trip to the post office to check. Some brides choose a special postage stamp – ask at the post office in advance.
Contact us on the following link:
[contact-form]
